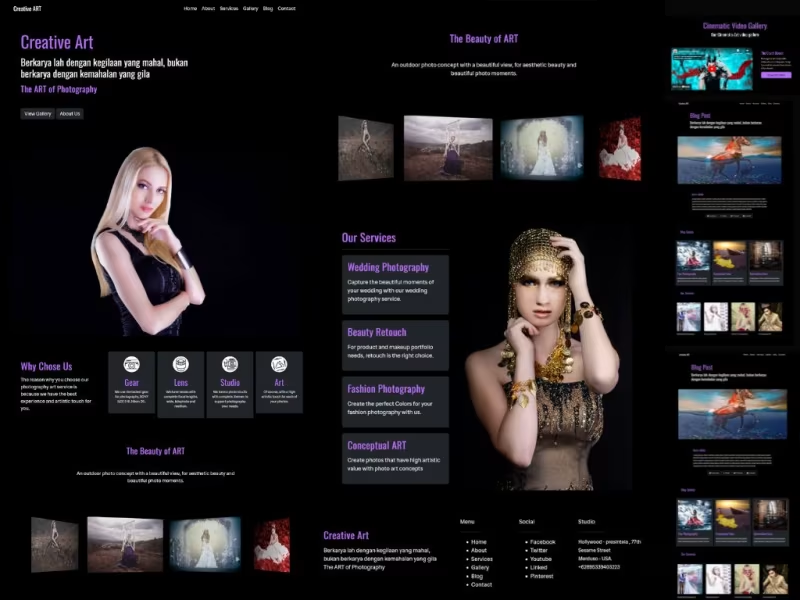
Astro Js Blacks multipurpose themes template
Blacks multipurpose for astro js website blog themes template with complete features.
Features
- Astro JS
- SEO Focus
- Black Themes
- Multipurpose Template
- Image Gallery
- Video Gallery
- Astro Picture
- Astro Image
- Astro Transition
- Preact Integration
- Page Article
- Blog Article
- Contact Form
- Categories and Tags
- Pagination Page List
- Modern Host support netlify vercel cloudflare and others
- Build production host firebase surge cpanel vps direct admin plesk and others
Copy URL
Embed Code
How To
1
Download or Order Template
2
Read Documentation Project
3
Run Project on your website
themestemplate website themes website template blog themes blog template mulitpurpose themes mulitpurpose template astro template astrothemes featuredpremium premiumthemes
Astro Js Blacks multipurpose themes template Content Docs
Astro JS Photography ART Themes # .
Premium Astro Template - Develope by creativitas
https://www.fiverr.com/creativitas/
Installation this astro themes project # .
Local Installation # .
- For first you need to install node js , you can download node here
- Download source code project and extract on your project folder.
- Access your project folder with terminal , for example your project folder is locate on desktop so you can run this command
cd C:\Users\pcname\desktop\project- change pcname with your pc name and change project with your project name. - After that you can run installation command
npm install - Now you can run your project on your local devices , with run this command
npm run dev - Visit
localhost:4321
Work with this astro blacks # .
Now you need to update and config your website,for first you need to access on src/data open config.json and home.json files and change with your needed.
You can change title, description ,and others for your website.
Configuration and update home page # .
access on src/data and open config.json files and change with your needed.
You can change title, description ,and others for your website.
fontformatter
{
    "url": "insert your website url domain here",
    "title": "insert title in here",
    "description": "Your website description",
    "favicon": "url image for your favicon",
    "image": "url image for image banner",


    "navbar": "Navbar title in here",
    "nav_list": [
      {
        "nav": "Home",
        "link": "/"
      },
// if you want add new nav menu you can simple, just copy and paste code like this..
      {
        "nav": "This is nav name",
        "link": "url for your nav menu in here"
      },

// implementation navigation area
    "nav_list": [
      {
        "nav": "Home",
        "link": "/"
      },
      {
        "nav": "This is nav name",
        "link": "url for your nav menu in here"
      }
    ],


// social media area
    "social": [
      {
        "title": "Facebook",
        "link": "https://www.fiverr.com/creativitas/"
      },
      {
        "title": "This is your social media name",
        "link": "social media url in here..."
      },
      {

        "title": "Instagram",
        "link": "https://www.fiverr.com/creativitas/create-your-custom-website-and-app"
      }
    ],


// your contact area
    "contact":
      {
        "address": "insert your address in here",
        "city": "insert city here..",
        "country": "Insert country in here...",
        "phone": "insert your phone number here..",
        "email": "insert you email here...."
      }
}
After you have setup your config files, you can save it , for update your website.
Next you can move to src/data/home.json the concept is same like config.json just change and update with your needed, this home.json for update your homepage area.
Update About Page # .
Acces on src/pages/about/index.md
about for change your about page article, you can open index.md files and change with your needed.
Fontformatter :
---
layout: ../../design/about.astro # default template
title: your title in here
description: Input description in here
image: insert url image here
intro: your intro in here
---

Write article with markdown lang in here...
Update and change with you needed, then save it.
Update Article Blog Page # .
Access on src/pages/blog
blog this area for write blog post artilce, note: don't delete or change [..pages].astro file you can create new article by create new .md files and name it with your article for example hello-wolrd.md , then you can insert this fontformatter.
---
layout: ../../design/blog/blogpost.astro # this is default themes
title: "write your title in here"
description: "insert description here"
image: insert your image url
pubDate: insert date example 2023-12-04
tags: ["insert tag here", "tag1", "tag2"]
categories: 'insert categories in here'
---

Write your content with markdown lang here...
after you have update, save it.
For simple step, you can copy and paste from example.md files, then update / edit with you needed.
Update Contact Page # .
Access on src/pages/contact/index.md
contact this area for update your contact artilce page
Fontformatter
---
layout: ../../design/contact.astro # default themes
title: title for contact page here...
description: Your description in here
image: insert url image here..
---
write your contact content here...
after you have update, save it.
Update Gallery Index # .
Access on src/pages/gallery/index.md
gallery this area for update your gallery index page
Fontformatter
---
layout: ../../design/gallery/start.astro # default themes
title: Title for your gallery page here...
description: INsert description gallery page here...
image: Insert url for image cover here...
image_icon: insert url for image gallery here...
image_text: Insert text info for your image gallery here..
video_icon: insert your video gallery icon here...
video_text: insert your text info for video gallery here...
---
after you have update, save it.
Next you can create image or video gallery content.
Update Image Gallery # .
Access on src/pages/gallery/image
gallery/image this area for update your gallery image page
Note: don't delete [...page].astro files.
Fontformatter
---
layout: ../../../design/gallery/imagepost.astro # default themes
title: Insert title in here..
description: Description in here..
image: insert url image here...
pubDate: insert publish date here.. # example : 2023-12-05
tags: ["insert tag here,," , "tag1" , "tag2"]
categories: 'insert categories here..'
---
Write content in here...
after you have update, save it.
For simple and fast step, you can copy and paste from example .md files then edit with your needed.
Update Video Gallery # .
Access on src/pages/gallery/video
gallery/video this area for update your gallery video page
Note: don't delete [...page].astro files.
Fontformatter
---
layout: ../../../design/gallery/videopost.astro # default themes
title: Insert title in here..
description: Description in here..
image: insert url image here...
video: Copy the back of the video URL from YouTube , example B6RpLTSCz5o - or you can check on example md files
pubDate: insert publish date here.. # example : 2023-12-05
tags: ["insert tag here,," , "tag1" , "tag2"]
categories: 'insert categories here..'
---
Write content in here...
after you have update, save it.
For simple and fast step, you can copy and paste from example .md files then edit with your needed.
Update Services Page # .
Access on src/pages/services
services this area for update your services artilce page
Note: don't delete [...page].astro files.
Fontformatter
---
layout: ../../design/services/servicespost.astro # default themes
title: insert title in here...
pubDate: insert publish date here.. # example : 2023-12-05
intro: insert intro your services here....
description: insert description here...
image: inser url image here...
tags: ["insert tag here," , "tag1" , "tag2"]
---

write content in here....
after you have update, save it.
For simple and fast step, you can copy and paste from example .md files then edit with your needed.
Update Promotion WIdget / Content # .
Acces on src/pages/content
content for displaying promotion services or blog on your post article .
Note: you need to create four promotion widget
Fontformatter :
---
layout: ../../design/servicespost.astro # default
title: insert title in here...
link: link for widget promotion...
description: insert description here...
image: insert url image here...
pubDate: 2023-11-28
---
Update and change with you needed, then save it.
Cloud Installation # .
Before push your project, you need to add your domain.
For first you can open astro.config.mjs
and change site url with your domain name , example
export default defineConfig({
  site: 'yourdomain.com',
  integrations: [preact()]
});
change yourdomain.com with your domain name.
- After you have finish your project, now you can make your site live. so you need push your project in to git.
- Register and create an account on github / gitlab
- After you have create github account
- Create new repo and name it with your project
- Next open your project folder with terminal, and copy paste from github command from your repo - for push your project in to your github repo.
- Now you need to register or create an account on modern static hosts such as vercel, netlify, cloudflare and others . Register with your git account.
- Next you can create new project or page - then select or integration with your github repo project.
- Click deploy - and select astro as framework
- Finish !! your website is live !!
If you want , you can use our services for work with headless cms and setup your website project,until your website is live !!
Integration with headless CMS Now →
Need Help ?? Contact Us
Premium Astro Template - Develope by creativitas

Astro Js astronot website themes template

UPDATE NEW THEMES TEMPLATE
Select your favorite technology and website blog themes template


