16 Nov 2021
Django Blog CMS source code free download gratis
How to create website with Djogo a phyton django cms blog
Helloo again.... yeah on this article we share about how to built modern website project using djogo a phyton django content management system with blogging platform, yeah.. before you know if we have share source code project with native django, now we have develope a new project using backend admin django.Dna yap kawan man teman.. kita jumpa lagi dengan kode sumber terbuka yang bisa gratis kamu unduh untuk belajar ataupun untuk membangun sebuah situs dengan teknologi super keren ini ya.. si ular dan koboi tentunya akan ngebantu kamu dengan cepat untuk meyebarkan situs mu di internet.
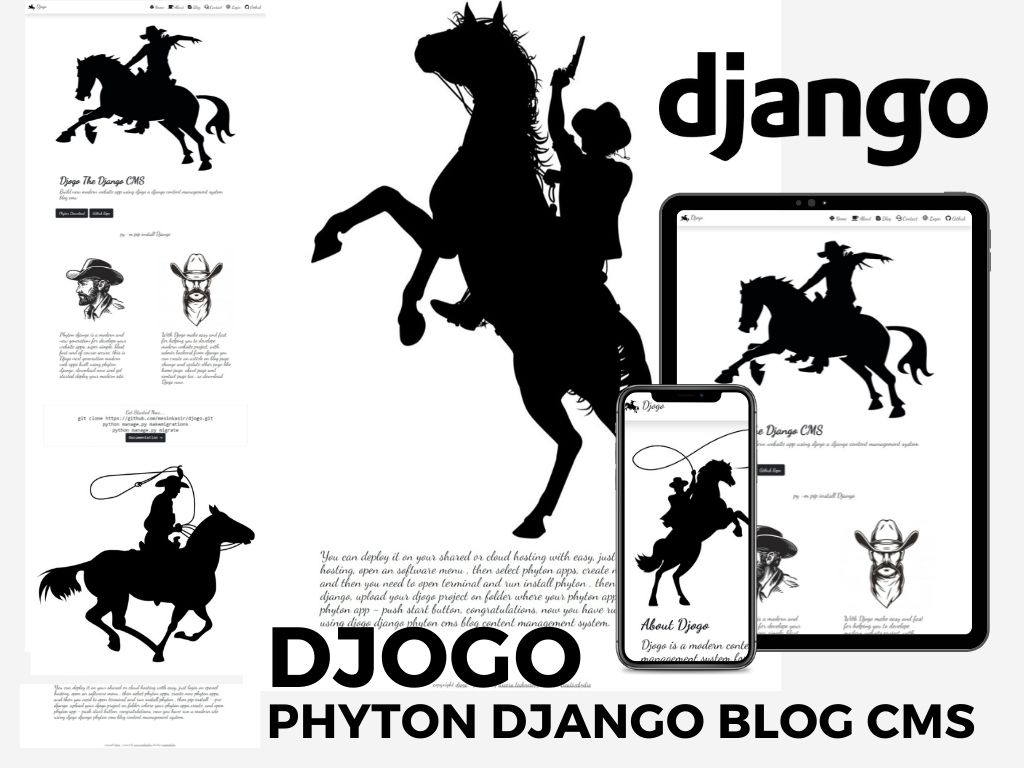
this is just a simple content management system for help you build website using a modern and top framework yeah.. phyton... on this project we design a landing page website with black and white concept, and of course with cowboy in here ... sound googd right.. unique design with black white color. now you must know why use djogo ?? with no doubt this content management system and blogging platform is very simple and easy to learn, with django backend admin by default, and integration using sqlite datbased so this web apps very very slim and lightweight for deploy your site.
Kenapa musti menggunakan nya, tentu saja hal yang terbaik adalah dengan super ringkas dan kecilnya ukuran file untuk kamu gunain , selain itu bener bener kenceng dan cepet banget deh, nikmati dong sensasi membangun proyek situs dengan teknologi ini, tentu saja sudah ada halaman kerja untuk web admin kamu melakukan berbagai perbuahan hingga update beberapa halaman sesuai dengan kebutuhan mu yess...
So with this web app you no need to configure an database on cloud or shared hosting you have, just upload and create new phyton apps, install django on your host, then start phyton and... congratulations now your modern site is live... wohoo.. cool right... oke... now before you cloud or installing on local device let you know about display concept we have design and deploy it. so let's get started....

This is display from home page area, using landing page design and of course with bootstrap injection make your web app very responsive if visit from any devices like, mobile smartphone , dekstop pc, tablet and other. the idea and concept just blackwhite color so your site is very clean and unique with ilustration .
dan wan kawan man teman di area beranda ini kalian bisa liat dong konsep sederhana bersih dengan warna dasar putih plus dukungan bayclin makin putih banget tuh gaess... iya gak sih...

Already with mobile display and navbar header menu for redirect to another page menu , by default because we using bootstrap the top css framewrok so your site very cool with retina responsive display .
dan wan kawan man teman ini adalah tampilan untuk akses via handphone ya jadi sudah otomatis menyesuaikan dengan perangkat apapun yang kamu gunakan.
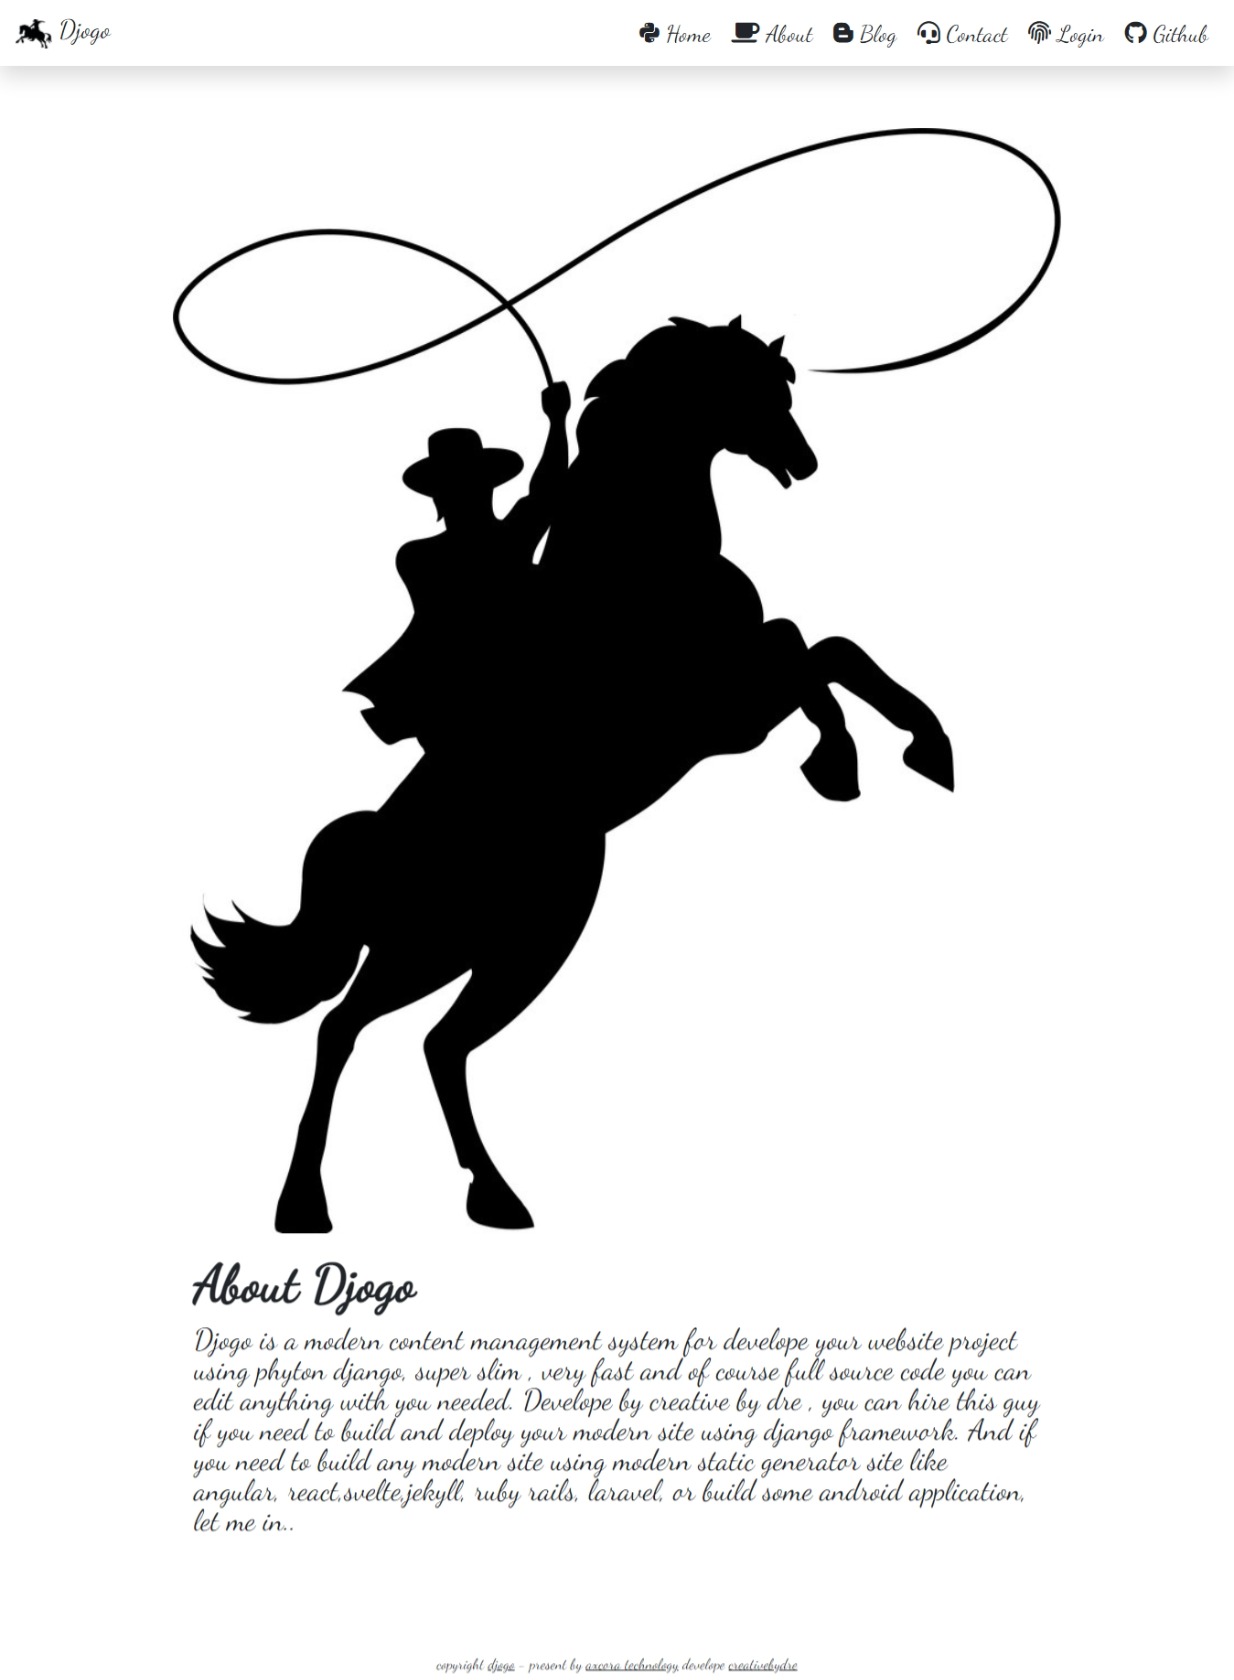
About page area display , for displaying information about your business in here, and you can change anything on backend admin with you needed for update about page area.
dan ini adalah halaman tentang ya biar lebih keren dan lengkap maka kamu bisa gunakan untuk menampilkan mengenai informasi ini pada halaman ini.
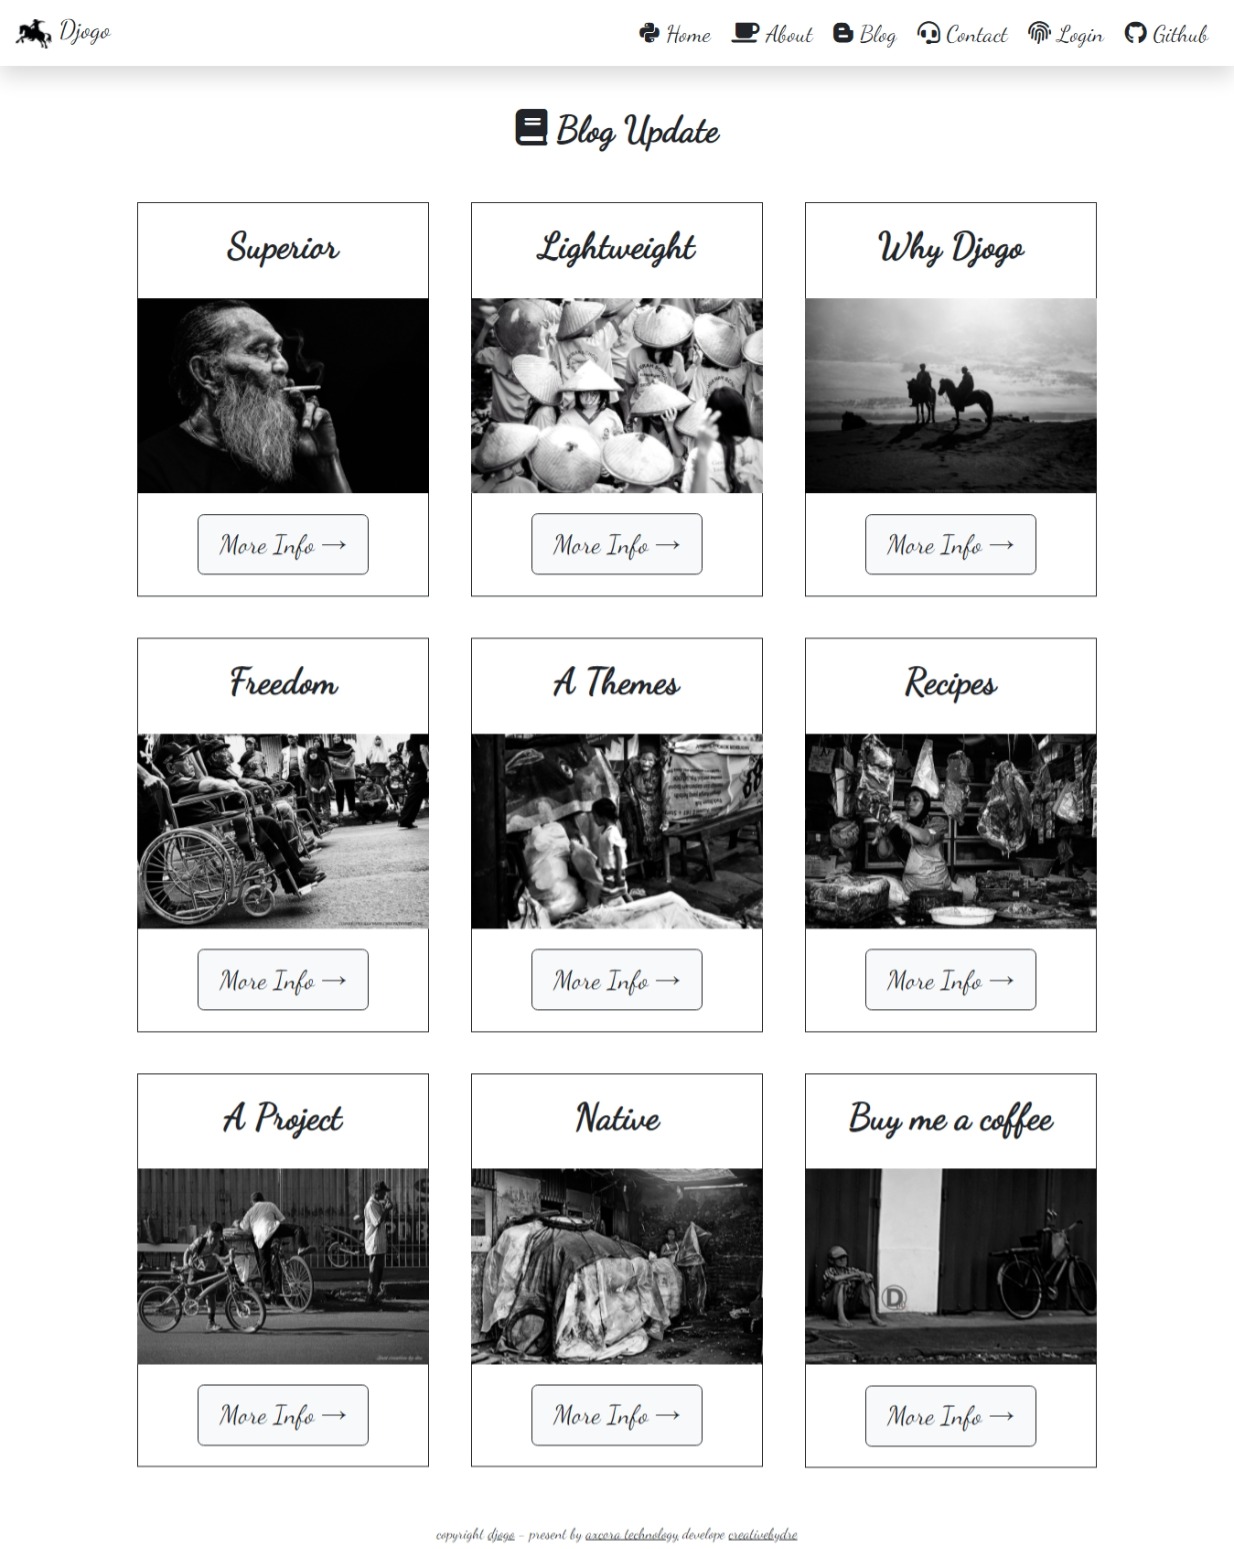
Very cool with blog page list area, so on blog page you can see all article you have create is publish on here, with image cover, title, and more info button for accsess the blog article page.
dan disini adalah halaman area khsusus blogger , yap nantinya semua konten yang bikin akan dimuat pada halaman ini kaka.. lebih keren dengan grid system yang digunain.

Contact page area is will displaying how to contact you, so you can input and insert whatsapp number, phone number, email and others..
Dan selanjutnya halaman kontak area untuk menampilkan bagaimana sih pengunjung situs kamu agar dapat terhubung dengan mu , jadi semua info bisa kamu tampilkan disini ya kaka.....
DOWNLOAD AND INSTALLATION
Oke now how to download and install this content management system blog, of course for first you need to download node beacuse we work with node for using shell terminal, so download node here → , after download node you can install it on your device then you can open shell terminal with click on windows logo - type cmd and hit enter, now we need to check a version node you have install, so run this command on your shell terminal and press enter button
node -v if shell terminal displaying node version , now you have successfully install node on your device, oke next... we need to installing phyton... so you can visit and download phyton here → , then install on your device... after installation finish, now we need to know about phyton version you have install, so open shell terminal and run this command python --version and your npm will displaying a version. and congratulation now we have install all third party apps for work with this Django Blog CMS source code free download gratis . Next step we need to download source code on our github repo , before download so let's create a new folder for this project you can name it with your own, allright now we can download djogo content management blog.
Master Download
for clone repo run this command
git clone https://github.com/mesinkasir/djogo.gitand now we have source code on your project folder, allright for first we need to installing django globaly on your device so open shell terminal then run this
pip install django after installation finish now you can check a django version with run py -m django --version , oke now we need to open this project folder so use a shell terminal then visit where your source code project is locate, for example the project folder is locate on desktop, so you can run shell terminal with cd C:\Users\pcname\Desktop\projectfolder - change pcname with your pc name and change project folder with your name of source code, oke now we need to migrate the database sqlite first on project so run this python manage.py makemigrations oke now we need to export all data on django phyton cms so let's do it with run python manage.py migrate , that's it your new modern web app is allready for use... now how to run this web app you can run with py manage.py runserver and you can visit localhost:8000 on your web browser. and viola... congratulations now you have successfully installation djogo a phjyton django content management system on your devices.
TROUBLESHOOT & PROBLEM SOLVED
it you have a problem for runing phyton maybe you can use with create a virtual enviroment, how to do that, so run this command on project folder
python -m venv venv this is for create an enviroment variables, then you need to activated with run command venv\Scripts\activate , and then you can installing django on your device.
FIRST WORK USING BACKEND ADMIN WEB APPS.
Oke after installation success now how to use for create an article, change any page ?? oke for first we need to accsess on admin area so you can visit localhost:8000/admin. you can see on admin login page right so by default you can login with username : admin and password :12345678 , then press login. as you know this backend web admin page is automaticly develope by django, so we team dev not develope this area, with this scheme so we can build an modern site with fast using django, because django very smart to know what we needed on backend admin area.
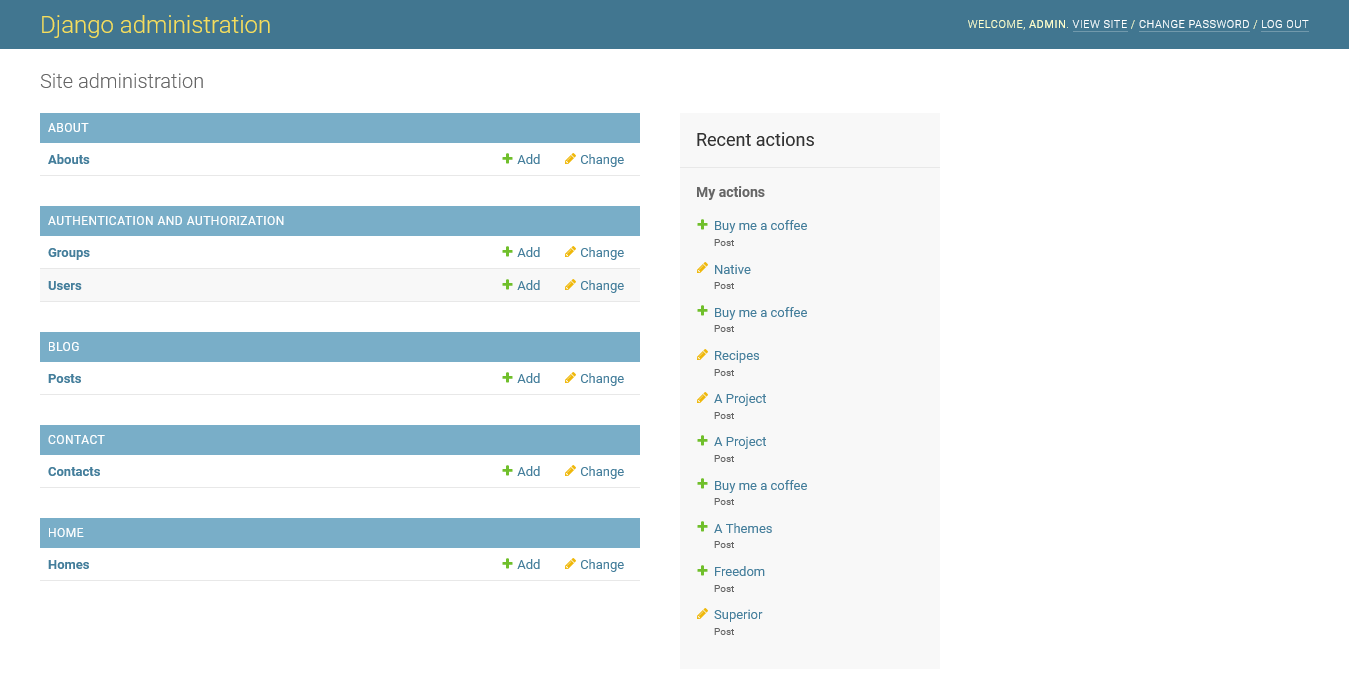
Now after presh an login button you will redirect to backend admin dashboard, and you can select an menu with you needed to change article or page in here
jadi wan kawan man teman secara otomatis ya halaman ini tercipta bukan kita yang ngebuat loh ya tetapi uda otomatis proses build nya, jadi kita sebagai developer gak capek capek lagi deh untuk urusan backend nya lebih cepet dong yess...
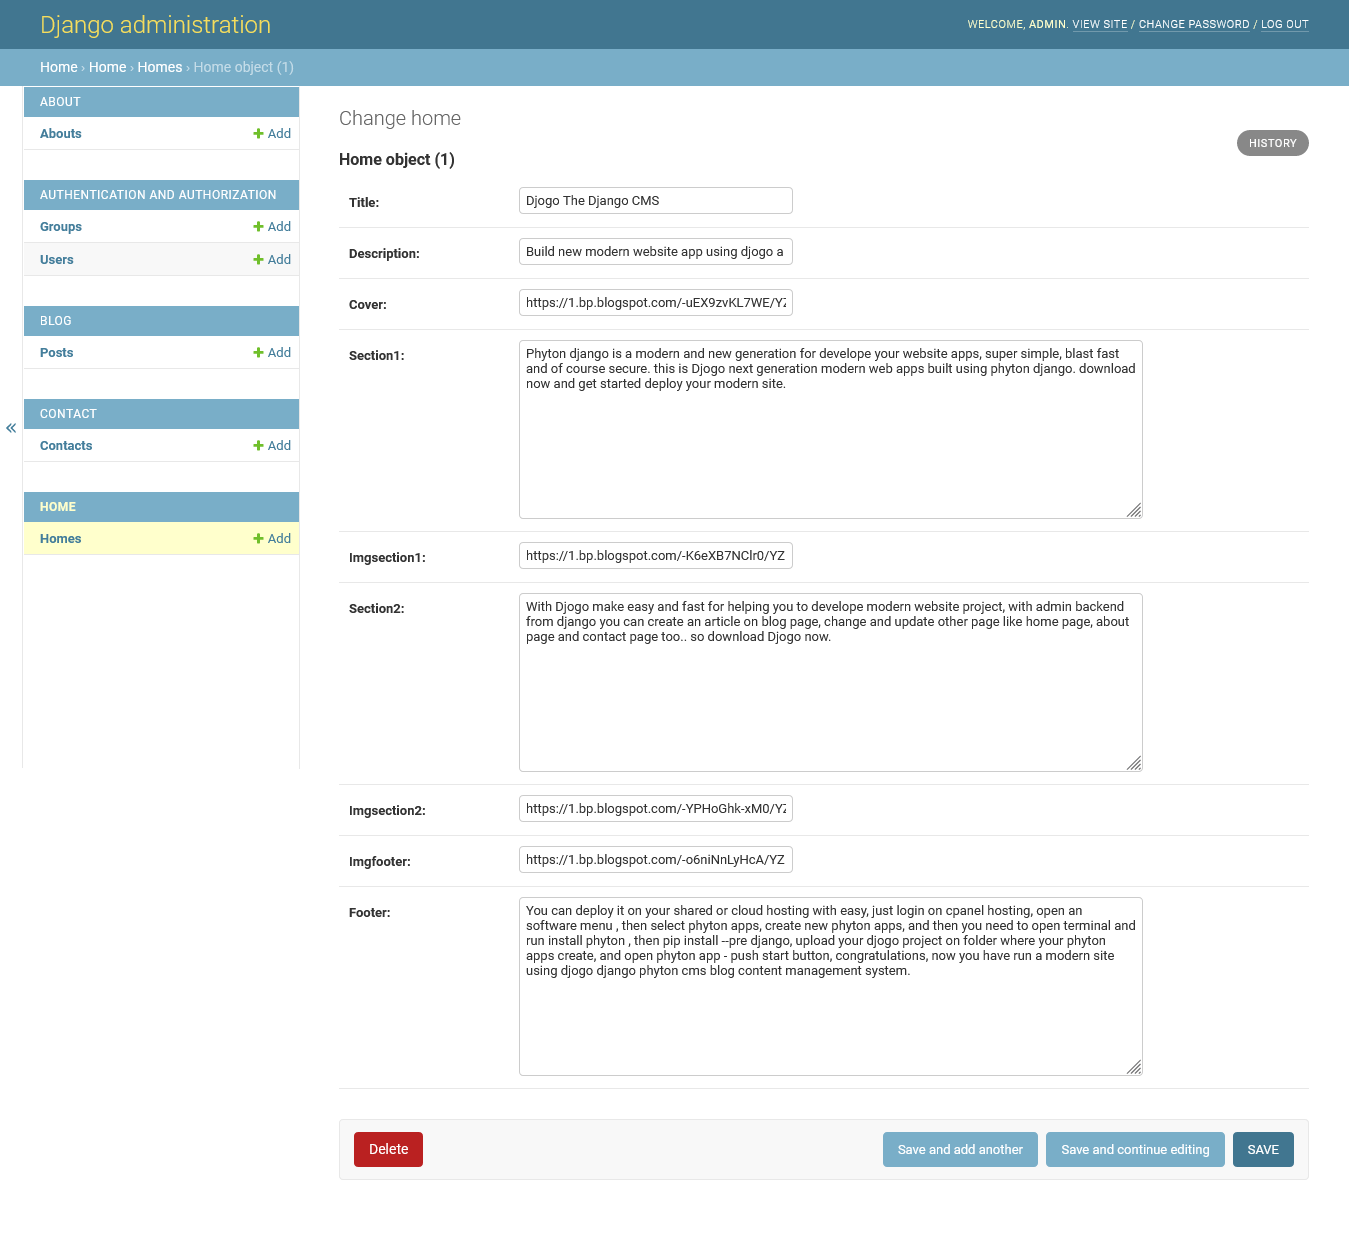
Oke now we can accsess on homes page menu for editing content and article on this page, very simple very easy, you just need to change all content and url cover image with you needed, so change all with your own. then save it to publish your new update.
jadi kaka gaess... disini ini kita bisa ngerubah dengan cepet , kamu tinggal ganti aja deh artikel dengan konten kamu dan foto ama gambar yang kamu gunain untuk mempercantik web kamu ya disini.
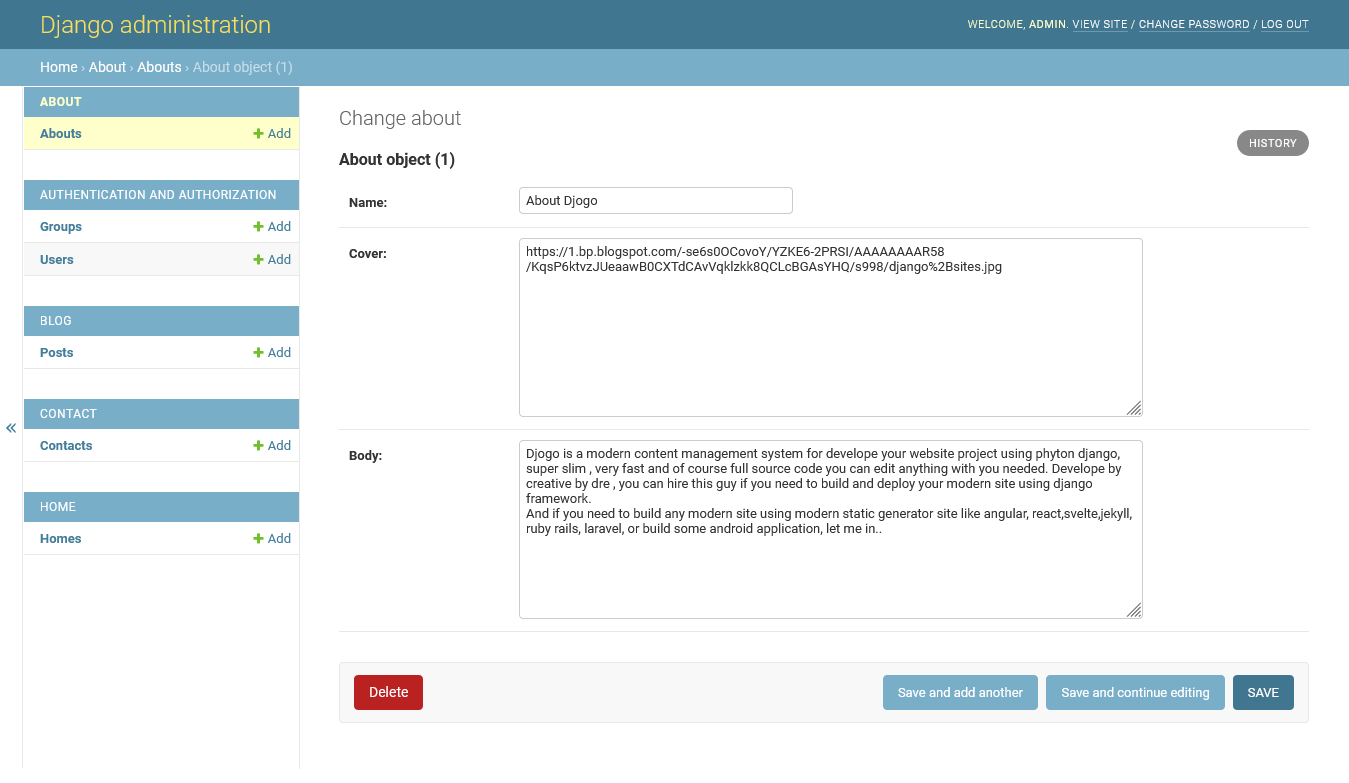
Same with homes pages, on about page you can change it too with you needed, just click on about menu then you can edit everything in here.. then save it for publihsing your update. very simple right....
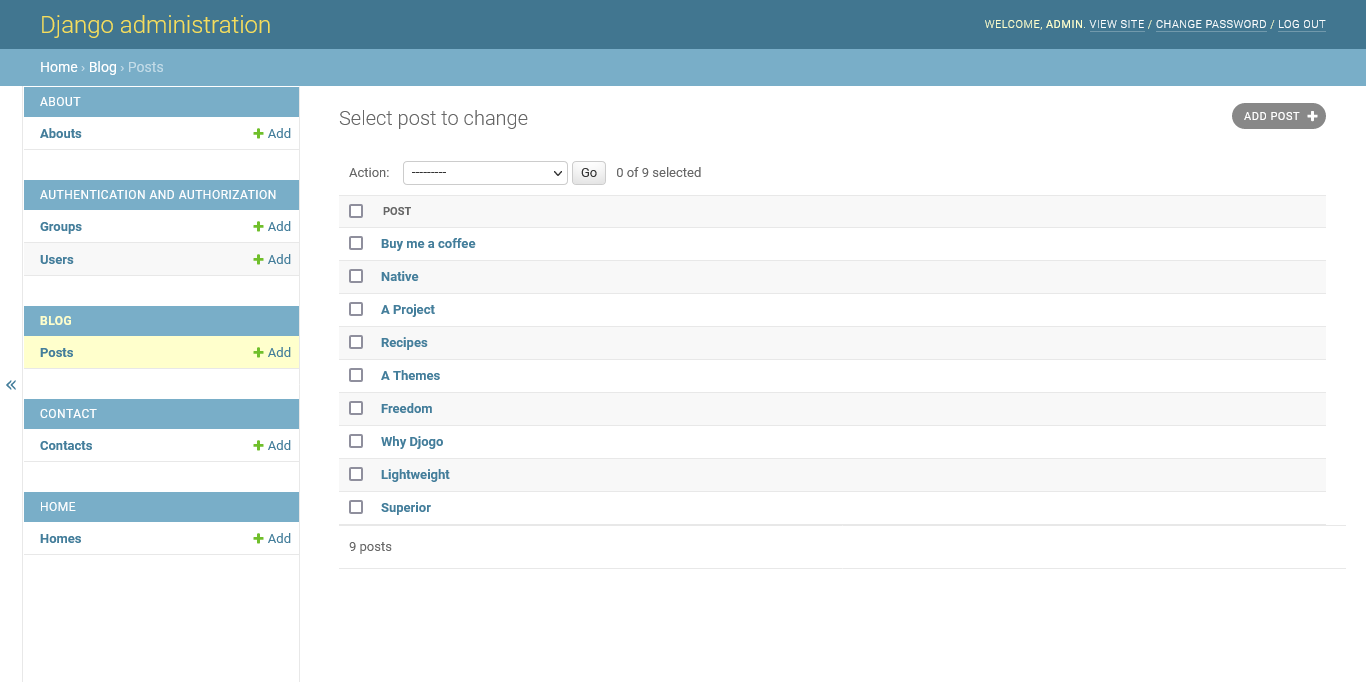
Then on blog pages, if you click on blog page now you will see all content you have created, by default we insert an example article so you can change the article or edit update and delete it, for create new you can click create an new article button then insert your title, cover image and input your article in here. for edit article just click on article you need to edit then update with your needed and save it.
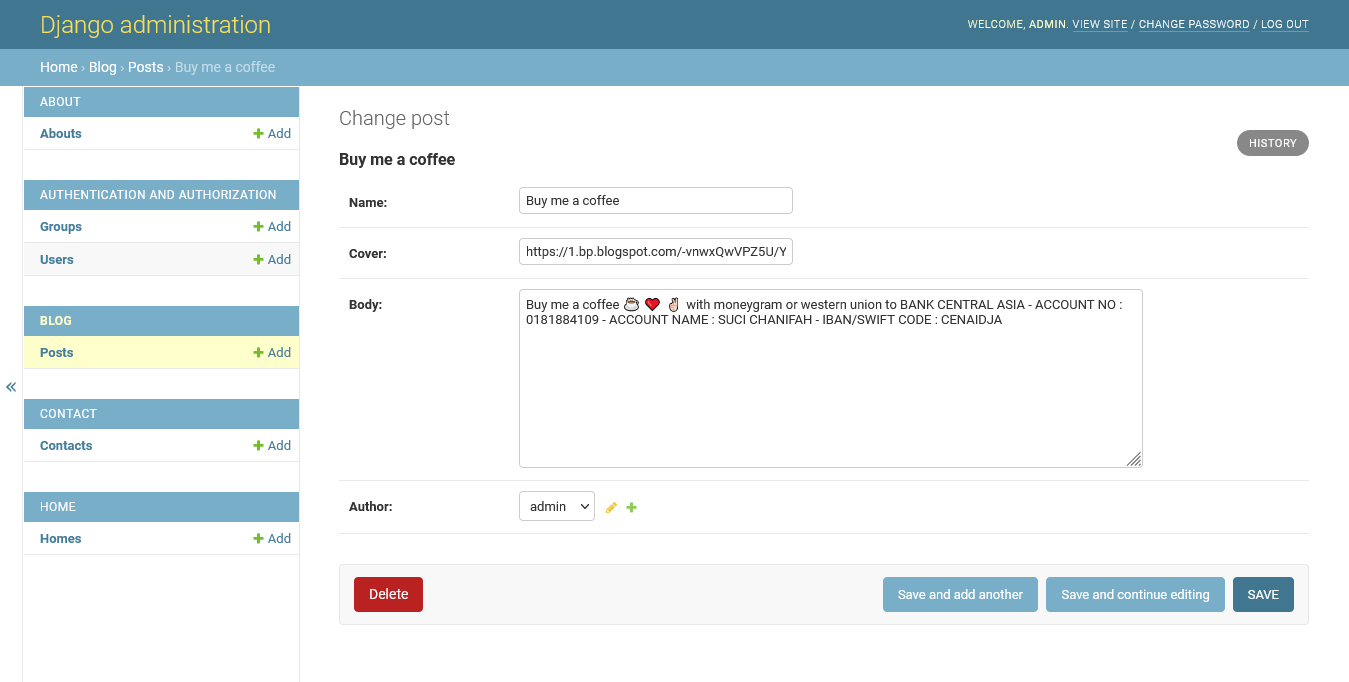
A example bog page like this, you can insert title, and patch copy url image cover and write content article in here.. don't forget to ave for publish your blog content .

Then you can visit on contact page to change with you needed in here, by default we have develope an shortcut button for redirect contact to your whatsapp , phone number and email to... so change all with your contact in here. then save it for update contact page. on front end when your website visitor click on whatsapp contact this Django Blog CMS source code free download gratis will automaticly redirect on your whatsapp contact. sound is good right.....
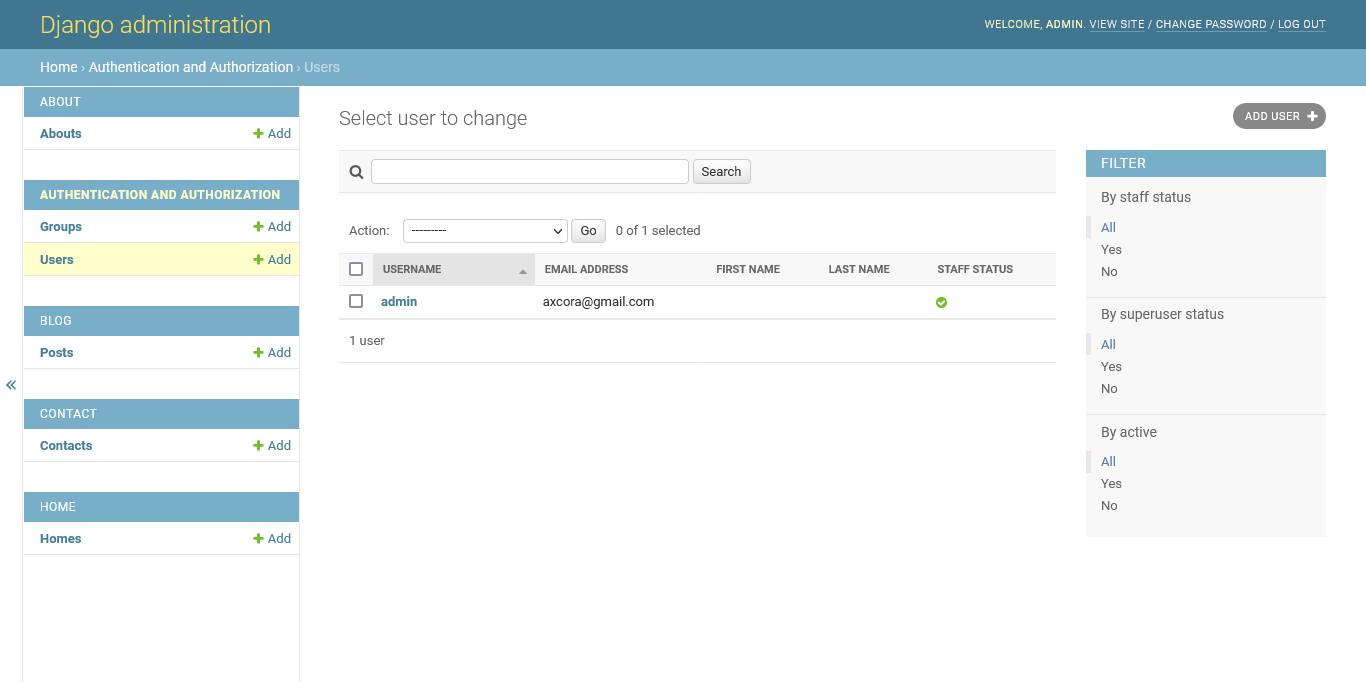
And the last you can create and user and user account to.. so for first you need to create an group with accsess , then you can create new user , then just insert username for login and password . that's it is very simple and easy to learn..
HOW TO RUN AND INSTALL ON HOSTING
Oke now if you have finish and change anycode for example change article, image , video and other with you needed, of course you wan to upload and run your modern web app build with django phyton right.. now you can order an hosting and domain of course on your provide host, then you can visit cpanel host, just login with your account, now you can install on root or you can use sub domain , if you need to install using subdomain , so let create a new sub domain,then name it sub domain with your own, for example mysite is new sub domain in here.alright now we need to visit on cpanel manager, then search phyton apps .
Baiklah wan kawan man teman cari berikut ini adalah bagaimana sih langkah dalam mendevelope project django phyton kita khusus nya di shared hosting kalian ya.. jadi dengan cara ini maka situs modern mu bisa langsung online, so pantegin dan ikuti cara nya dibawah ini ya .....

A display like this, just click on setup phyton apps on software menu cpanel hosting.

Now you will redirect on phyton app menu, so click create new button for create phyton apps.
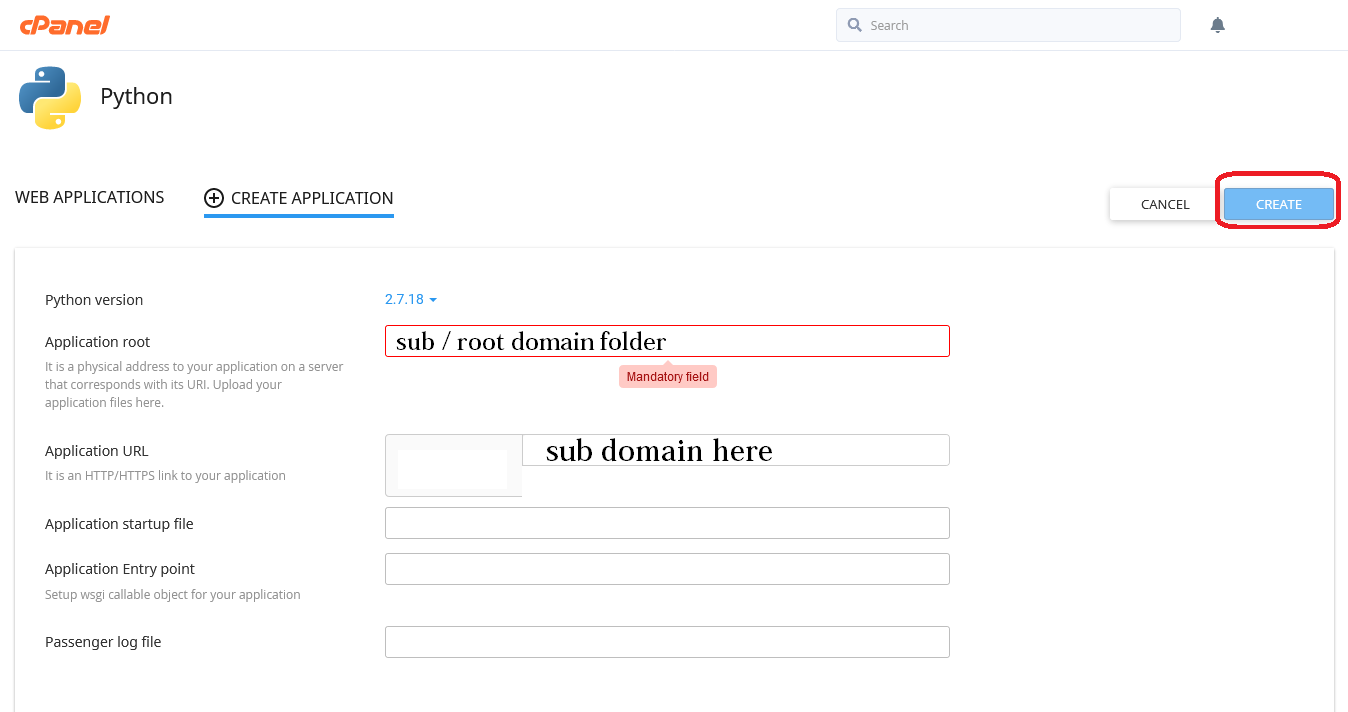
Oke now you need to setting phyton up like this, select a phyton version, and insert your subdomain name folder in here. don't forget to select an sub domain too...
after installation success you need to copy env , click copy then you can back on cpanel menu .

then search terminal features on advance menu , just click this terminal menu beacuse we need to install phyton django on sub domain folder project right.. so get started now... click on terminal.
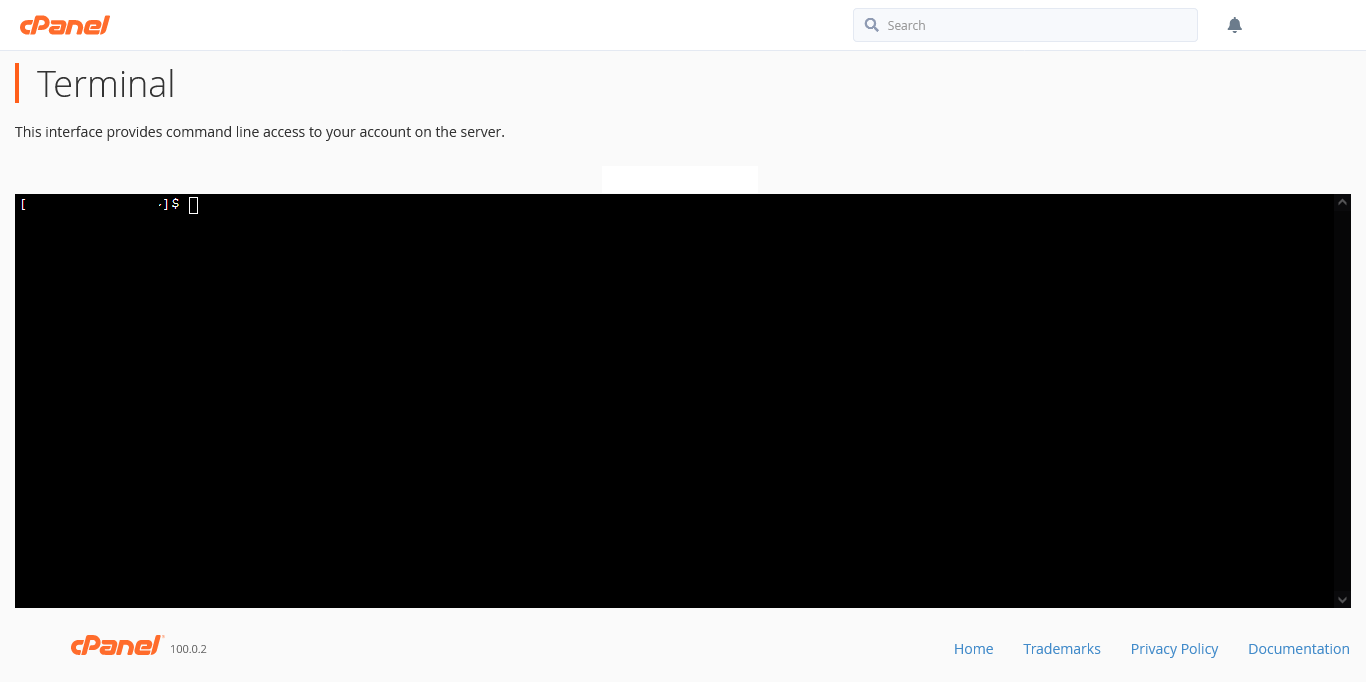
Holly smokeee.... cool right.... now you can work with this terminal for installing phyton and django of sure.... paste the env file first in here. (the env file you can copy from phyton setup apps menu)
After paste env file pres enter button. allright now we need to install django right.. so run this command
pip install django then after installation success so check a django version . run command python -m django --version.Sound good.... you have install django on your cloud hosting, now we need to extact your project folder on .zip file, then upload on your subdomain folder , after upload success just extact all files in here.
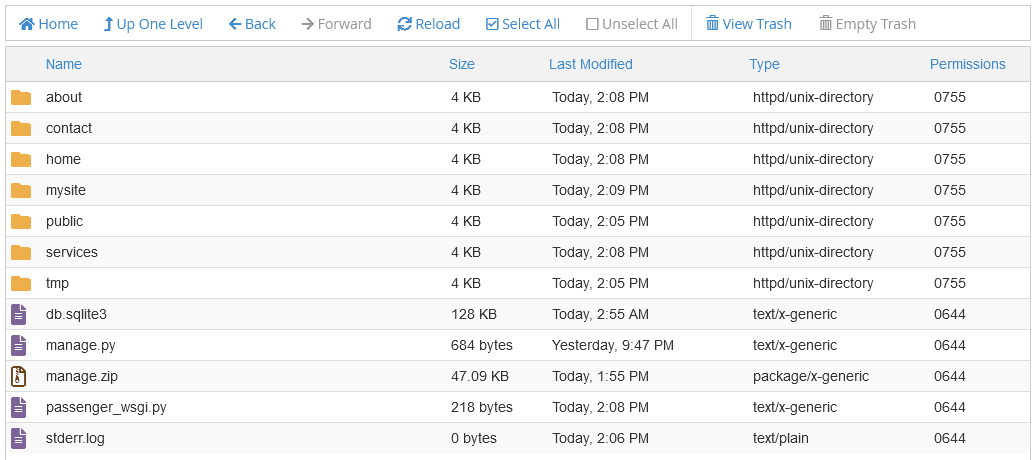
And your subdomain folder like this.. oke now we need to configure setting so visit on passenger_wsgi.py edit this with code editor , then you need to delete all code and replace with this code.
import sys

sys.path.insert(0, "/home/username/subdomain/mysite")


import os

os.environ['DJANGO_SETTINGS_MODULE'] = 'mysite.settings'

from django.core.wsgi import get_wsgi_application

application = get_wsgi_application()
you need to change username with your cpanel hosting username, then change subdomain with your subdomain for run this django phyton website.
Oke now we need to change and configure the allowed host , so visit on your project folder name for example if for this source code using mysite right, so visit mysite folder.

Now we need to configure files setting.py on this folder, just open and edit with your text editor, then you can insert your url website for example this.
ALLOWED_HOSTS = ['webdev.axcora.com']
Trouble shoot with admin miss stylesheet or css, yeah.. after you upload on host and create an phyton apps, sametimes mayb you can successfully to load admin backend css style, so you see the dashboard area with nothing css in here, this is very bad and ugly right... now how we do to fix this problem ?? for first you need to change and update setting.py files on djog folder, then open with your text editor, now we need to insert code like this..
STATIC_URL = '/static/'

STATIC_ROOT = 'static'
oke after you configuration setting file, now we need to change and insert code on urls.py file on djog folder, just open it with your text editor code, then we need to insert code like this...
from django.conf import settings

from django.conf.urls.static import static

from django.contrib import admin

from django.urls import path, include


urlpatterns = [

    path('admin/', admin.site.urls),

    path('',include('home.urls')),

    path('blog/', include('blog.urls')),

    path('home/', include("home.urls")),

    path('about/', include("about.urls")),

    path('contact/', include("contact.urls")),

] + static(settings.STATIC_URL, document_root=settings.STATIC_ROOT)
After insert a code you need to visit on terminal then run command
python manage.py collectstatic.Now we need to restart server , just visit on your cpanel hosting, then click on phyton apps , then click on restart button. allright... now visit your subdomain website, and congratulations your new modern website develope using django phyton is successfully run... sound good right.......
Oke we hope on this article we can learn about django and phyton of course using this Django Blog CMS source code free download gratis.
and see ya in next source code project.....
Or you can download all our source code project for free in here →
Django Phyton Full source code native donwload here →
A SERVICES
And if you need to develope and build modern site using modern technology so you can contact our team.
Contibution with donation for support our team dev make other source code for the world.
Buy me a coffee ☕️ ❤️ ✌🏻Donate Now
 How to fix deploy angular on netlify
 Install add bootstrap to next js
 Blazor peforma mu gak bahaya ta??
 Cara agar iframe bootstrap jadul lama menjadi responsive.
 Mengatasi building development bundle error.
 Web Modern Built time yang Horor banget !!
 Rent Car CMS free download full source code
 Why my pico website is display blank white ??
 Mengetahui Status Sitemap pada Google Search Console
 Cara melakukan update gatsby cepat dan mudah
 Error digital envelope
 Error svelte adapater build


 About kasir apps online
 Ang application ng cashier ng restawran at shop
 Aplikasi Bengkel Software Program Bengkel
 Aplikasi Bisnis Office
 Aplikasi kasir bill restoran online murah
 Alarm Security
 Aplikasi
 Aplikasi Akuntansi
 Aplikasi Grosir dan Eceran Toko
 Aplikasi Invoice
